Chadis Crafts' Fun Pages
POLYMER CLAY FOR SENIOR CITIZENS
PAGE
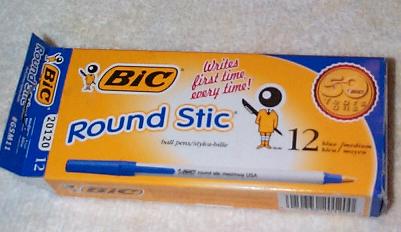
Clay Cover BIC Pens
To
see other clay on pen projects see my camp picture
pages. To see more of my clay on yogurt bottles see my Clay covered yogurt bottles
page. See my Basic Clay Pages for lessons on how to use
and bake Polymer Clays.
Clay Canes on White Sculpey
Base
Pens with Canes directly on pen.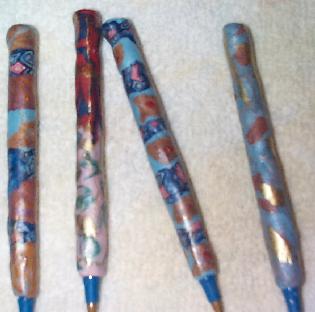
A Senior Citizen Clay class for fun and theraphy
was a new class for me. It had interesting challenges. It was suggested by the
Senior Coordinator for the
Jewish Community Center of South Hampton Roads of Norfolk and Virginia Beach
Virginia. She wanted to have a full day program for Seniors that would
possible be theraputic but also would bring out more active seniors then their
usual lunch program. "A Day at
the J" was a full day of activities: Chair arobotics, Crafts, Lunch and a guest
speaker who covered special interest topics. I was asked to do the craft
class. We picked clay for the craft. We thought if we use a soft polymer clay (this time Sculpey
and Sculpey III) the softening of the clay could be great for exercising fingers
and hands. Plus if they picked the pen to make,its thickness would be a great for sore or painful hands.
Because we did not know how this class would go we did only one introductory
demo at a Senior Luncheon and then planned on one class. This limits the
projects we could do.
Supplies for Clay Covered Pens:Sculpey White Clay in 1 3/4 pound
box.Colored Sculpey IIIBIC pensPliersWax paper
for clean surface to roll clay on.If
using Cane slices some kind of safe cane slicer. I use the blank metal bracelet
forms sold for lanyard bracelets.Sculpey Gloss or Future Floor
WaxGold Metallic Powder for Polymer Clay
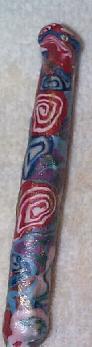
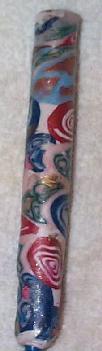
Directions:Soften the white
Sculpey. Roll into sheets for project base. Cover the pen but not the metal
part or the blue plastic part. This allows you to remove the ink supply before
baking. Have them trim the excess. Soften the colored clay. Here is where I went
wrong. Stick to simple jelly rolls canes or snakes to decorate the first time. Unless
you have more than 45 to 1 hour class. Have them make the snakes with multiple
colors. If using jelly roll canes have them make their own. Don't try and demo
anything fancy on canes. Save that for a class you will have the same students
for multiple sessions. Have them gently place the snakes or canes on top of the
white. Roll the pen in your hand to smooth. Bake with ink supply is out. Place
ink supply back in after baking and when cool use Future Floor Wax or Sculpey
Gloss to coat the shine onto project. I used small amounts of gold metallic
powder for polymer clay to add some glitter to the project and to hide some of
the white clay.
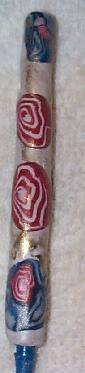
Cane Slices Directly on Pens:I had some extra cane
slices and felt bad that some people had not felt well enough to come to the
class after they signed up. I took the canes and placed the clay directly onto
the pens. Rolling them smooth.
|
Clay Covered Dannon Drinkable
Yogurt Bottles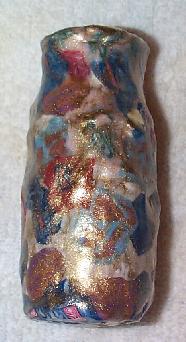 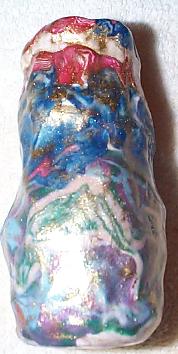
Project can be used
for small vase or desk pencil holder.I have
used these bottles in a few different classes. Preschool to teen. I tried to
find another useful project that would fit in our budget. I save these bottles
over many months. The students that picked this project used a sheet of white
clay then decorated with some jelly roll canes we tried to make. I added gold
metallic powder to make them a little more interesting.
Second
Class
Rubber Stamping Clay Pins Using Brown Antiquing and Gold.
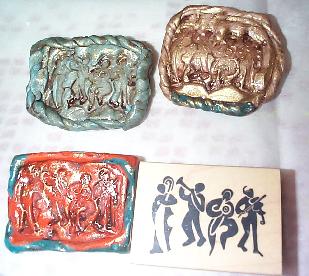 I
taught a second class this summer of Senior Clay. It went much better! I
concentrated more on playing with clay and less on teaching clay techniques.
More therapy! In a 45 minute to 1 hour class, we made about 2 pins each. We
used about 1 oz of Sculpey per pin. I had an assortment of large and a few
small stamps in both Jewish and other designs. I took the finished pieces
home to back and I did all of the antiquing. See
my Clay and Rubber Stamp Pages for more pictures
and instructions of stamped pins.
To
see other clay on pen projects see my camp picture
pages. To see more of my clay on yogurt bottles see my Clay covered yogurt bottles
page.
Some suggestions for group leaders: Things I have learned after teaching my
first class of seniors!Don't try to be too fancy the first
class.Pick one project. Don't assume that you can do different ones
because they are not children. Most seniors have not worked with polymer clay
before.
Because of different levels or skills, some hearing problems etc.,
work in the middle of the table where all can see and hear you. Have hand
wipes ready to use to clean hands when switching colors. Even if the room has a
sink.Seniors can get as excited as young children and as
bored! Explain the project, if you really must offer a choice, make sure they
understand only one project per person. Otherwise some will work too quickly
trying to make two things. You might run out of clay or over your budget.The Pasta Machine used in many clay classes is great for Seniors
too. It rolls out the clay quickly and in a fun way. Have them
scratch their name on their project. Most people do not recognize their finished
projects. Especially if you add gold powder to it later.Having their
name on it helps if someone else has to give out your projects after you have
baked them.Above all be done before
someone says lunch is ready!
|


 Future
Craft Lesson Pictures
Future
Craft Lesson Pictures